
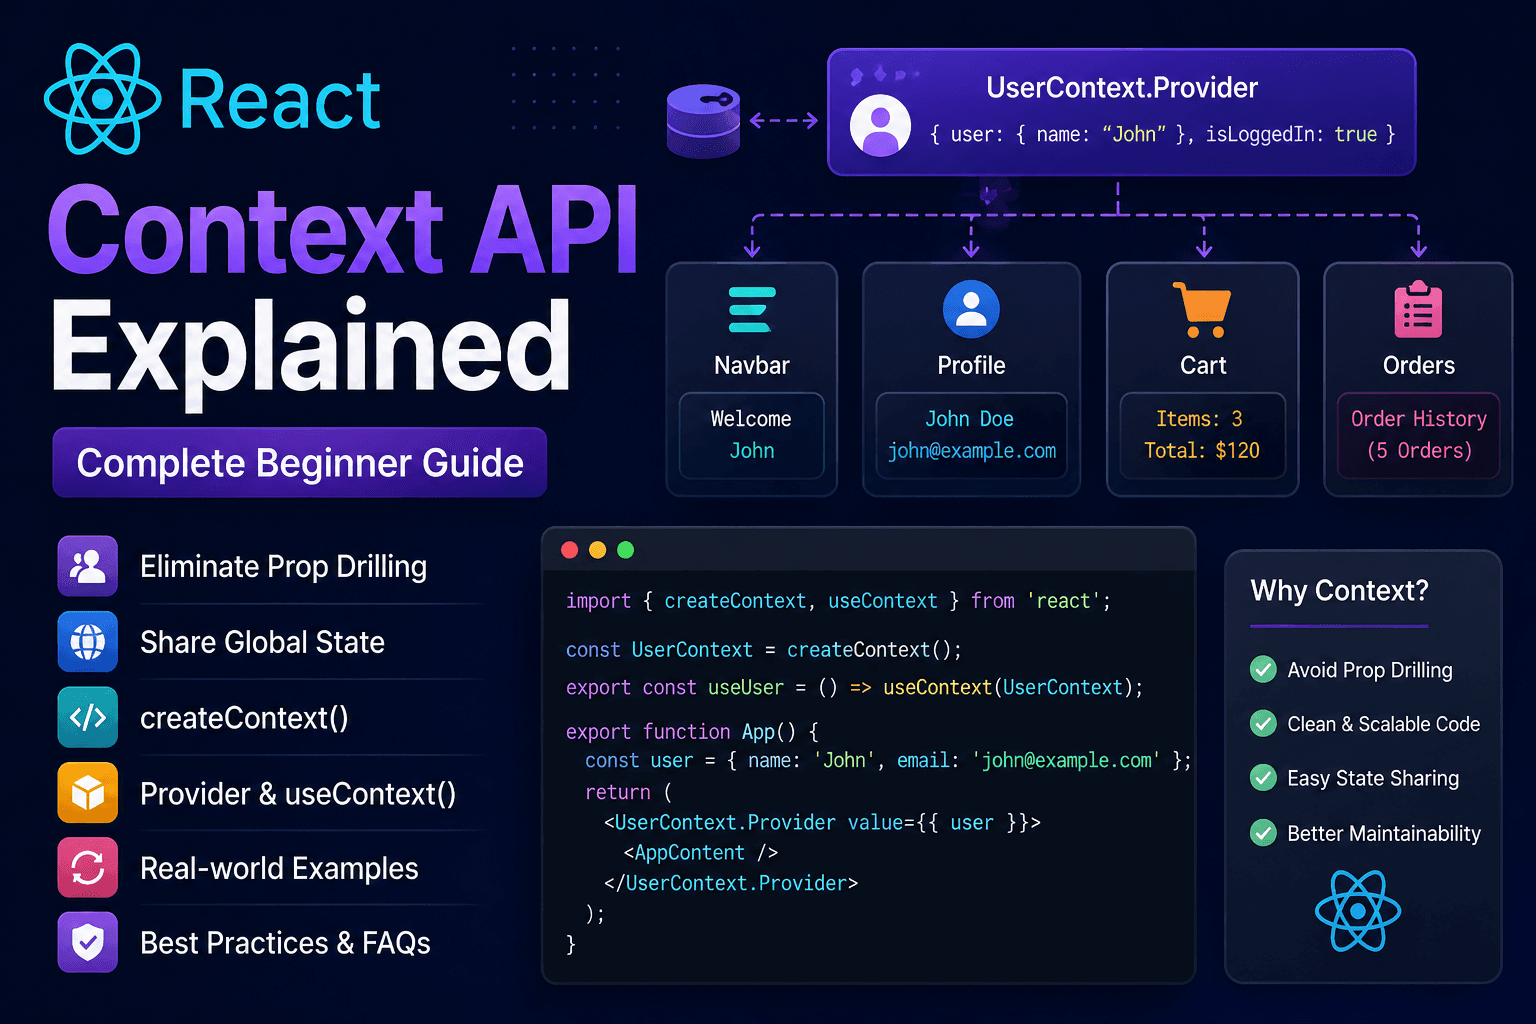
Common Mistakes and Best Practices with React Context API
The React Context API is an excellent tool for sharing data across components, but using it incorrectly can lead to performance issues and code that's difficult to maintain.
Many beginners start using Context for every piece of state in their application.
While Context is powerful, it's important to understand when to use it and when not to.
Let's explore the most common mistakes and learn the best practices followed by experienc# Introduction to React Context API
As your React applications grow, passing data between components can become difficult.
Imagine you're building an e-commerce website.
You have a logged-in user whose information needs to be displayed in multiple places:
- Navbar
- Sidebar
- Profile Page
- Shopping Cart
- Checkout Page
- Order History
A common approach is to pass the user object through component props.
App
 │
 ├── Navbar
 │
 ├── Dashboard
 │      │
 │      ├── Sidebar
 │      │
 │      ├── Profile
 │      │
 │      └── Orders
 │
 └── Footer
If every intermediate component has to pass the same data to its children, your code becomes repetitive and difficult to maintain.
This problem is known as Prop Drilling.
React provides the Context API to solve this issue.
Instead of manually passing props through every component, Context allows data to be shared directly with any component in the tree.
Think of Context as a shared storage for your application.
Components can read values from this shared storage without requiring every parent component to forward the data.
What You'll Learn
By the end of this guide, you'll be able to:
- Understand what the React Context API is
- Identify when prop drilling becomes a problem
- Create a Context
- Provide values using a Context Provider
- Consume values using the
useContextHook - Share global data across your application
- Build practical examples such as themes and user authentication
- Avoid common mistakes
- Follow React best practices
What is Prop Drilling?
Before learning Context, it's important to understand the problem it solves.
Suppose your application looks like this:
App
 │
 ▼
Dashboard
 │
 ▼
Profile
 │
 ▼
UserCard
The logged-in user exists in the App component.
jsxconst user = { name: "John Doe", email: "john@example.com" };
To display the user's name inside UserCard, you need to pass it through every intermediate component.
jsx<App user={user} />
↓
jsx<Dashboard user={user} />
↓
jsx<Profile user={user} />
↓
jsx<UserCard user={user} />
Notice that Dashboard and Profile don't actually use the user object—they simply forward it to the next component.
This is called prop drilling.
As your application grows, prop drilling makes components:
- Harder to read
- More difficult to maintain
- More tightly coupled
- More repetitive
How Context API Solves Prop Drilling
Instead of passing data through every level of the component tree, Context lets you provide the data once and access it wherever it's needed.
Without Context:
App
 │
 ▼
Dashboard
 │
 ▼
Profile
 │
 ▼
UserCard
With Context:
          User Context
               │
 ┌─────────────┼─────────────┐
 │             │             │
 ▼             ▼             ▼
Navbar      Profile      UserCard
Now any component inside the Provider can access the shared data directly.
No unnecessary prop passing is required.
What Can You Store in Context?
The Context API is suitable for data that many components need to access.
Common examples include:
- Logged-in user information
- Authentication status
- Dark and light themes
- Language preferences
- Shopping cart
- Currency selection
- Notifications
- Application settings
For example, instead of passing a theme prop through multiple components, you can store the current theme in a Context and let any component read or update it.
When Should You Use Context?
Use the Context API when:
- Multiple components need the same data.
- Passing props through many levels becomes inconvenient.
- The data represents application-wide state.
Examples include:
- User authentication
- Theme switching
- Language selection
- Shopping cart summary
- Global notifications
However, avoid placing every piece of state into Context. State that is only needed by a single component or a small parent-child group should usually remain as local component state.
Summary
The React Context API is designed to simplify data sharing across your application. It helps eliminate prop drilling by allowing components to access shared values directly, resulting in cleaner, more maintainable code.
In the next section, we'll create our first Context, learn how to use createContext(), and understand how the Provider makes data available to the entire component tree.
Creating Your First Context
Now that you understand the problem of prop drilling, let's create our first React Context.
Creating a Context involves three simple steps:
- Create a Context
- Provide the Context to your application
- Consume the Context in any child component
Let's go through each step one by one.
Step 1: Create a Context
React provides the createContext() function for creating a new Context.
jsximport { createContext } from "react"; const UserContext = createContext();
Here:
createContext()creates a new Context object.UserContextwill hold our shared data.- Any component inside this Context can access its value.
Think of it as creating a container that can store shared information.
UserContext

↓

Shared Data

↓

Available to Child Components
By itself, the Context doesn't contain any data.
It simply creates a place where data can be stored and shared.
Step 2: Provide the Context
After creating the Context, the next step is to make it available to your components.
React does this using a Provider.
jsximport { createContext } from "react"; export const UserContext = createContext(); export default function App() { const user = { name: "John Doe", email: "john@example.com" }; return ( <UserContext.Provider value={user}> <Dashboard /> </UserContext.Provider> ); }
Notice the value prop.
jsx<UserContext.Provider value={user}>
Whatever you pass to the value prop becomes available to every component inside the Provider.
Flow:
User Object

↓

Provider

↓

All Child Components
Understanding the Provider
Think of the Provider as a parent that shares information with all of its descendants.
UserContext.Provider
            │
     value={user}
            │
    ┌───────┴────────┐
    │                │
    ▼                ▼
 Dashboard        Navbar
    │
    ▼
 Profile
    │
    ▼
 UserCard
Every component inside the Provider can access the same user object.
There is no need to pass it through props.
Step 3: Consume the Context
Now let's access the shared data.
React provides the useContext Hook.
jsximport { useContext } from "react"; import { UserContext } from "./App"; export default function UserCard() { const user = useContext(UserContext); return ( <h2> {user.name} </h2> ); }
Output
John Doe
That's it.
No props.
No intermediate components.
No prop drilling.
Complete Example
App.jsx
jsximport { createContext } from "react"; import Dashboard from "./Dashboard"; export const UserContext = createContext(); export default function App() { const user = { name: "John Doe", email: "john@example.com" }; return ( <UserContext.Provider value={user} > <Dashboard /> </UserContext.Provider> ); }
Dashboard.jsx
jsximport Profile from "./Profile"; export default function Dashboard() { return <Profile />; }
Notice that Dashboard doesn't receive or pass any props.
Profile.jsx
jsximport UserCard from "./UserCard"; export default function Profile() { return <UserCard />; }
Again, no props are needed.
UserCard.jsx
jsximport { useContext } from "react"; import { UserContext } from "./App"; export default function UserCard() { const user = useContext(UserContext); return ( <div> <h2>{user.name}</h2> <p>{user.email}</p> </div> ); }
Output
John Doe

john@example.com
The UserCard component can access the shared data directly, even though it is several levels deep in the component tree.
How Data Flows
Here's what happens behind the scenes:
App Component

        │

Creates User Object

        │

Provides Context

        │

────────────────────────────

Dashboard

        │

Profile

        │

UserCard

        │

useContext(UserContext)

        │

Gets User Data

        │

Displays Information
Notice that neither Dashboard nor Profile needs to know anything about the user object.
This keeps components simpler and easier to maintain.
Why is This Better Than Props?
Without Context:
App

↓

Dashboard

↓

Profile

↓

UserCard
Every component passes:
jsxuser={user}
Even if it never uses it.
With Context:
App

↓

Provider

↓

Any Child Component
Only the components that need the data call:
jsxconst user = useContext(UserContext);
This results in cleaner, more maintainable code.
Best Practices
When creating Contexts:
- Give the Context a descriptive name, such as
UserContextorThemeContext. - Wrap only the parts of the application that need access to the shared data.
- Export the Context so it can be imported wherever needed.
- Keep Context focused on related data instead of storing unrelated values together.
Summary
Creating a Context is straightforward:
- Create it with
createContext(). - Wrap components with a
Provider. - Access the shared value using the
useContext()Hook.
This simple pattern eliminates prop drilling and makes shared data available throughout your component tree.
In the next section, we'll dive deeper into the useContext Hook, learn how it works internally, and build practical examples such as Theme Switcher, User Authentication, and Shopping Cart using the Context API.
Understanding the useContext Hook
In the previous section, you learned how to create a Context using createContext() and how to make data available using a Provider.
Now let's learn how child components actually access that shared data.
React provides the useContext Hook for this purpose.
It allows any component inside a Provider to read the current Context value without receiving it as a prop.
Think of it like this:
Context Provider

        │

Shared Data

        │

──────────────────────────

Component A

Component B

Component C

        │

useContext()

        │

Access Shared Data
Instead of passing props through multiple components, any child can simply call useContext().
Syntax of useContext
The syntax is very simple.
jsximport { useContext } from "react"; import { UserContext } from "./UserContext"; function Profile() { const user = useContext(UserContext); return <h2>{user.name}</h2>; }
The Hook accepts one argument:
jsxuseContext(UserContext)
React returns the current value stored inside the nearest UserContext.Provider.
How useContext Works
Suppose your application looks like this.
App
 │
 ▼
UserContext.Provider
 │
 ├── Navbar
 │
 ├── Dashboard
 │      │
 │      ▼
 │   Profile
 │      │
 │      ▼
 │   UserCard
 │
 └── Footer
The Provider stores:
jsxconst user = { name: "John Doe", email: "john@example.com" };
Inside UserCard:
jsxconst user = useContext(UserContext);
React automatically finds the nearest Provider and returns its value.
UserCard

↓

useContext()

↓

Nearest Provider

↓

Returns User Object
No props are required.
Example: Display Logged-in User
App.jsx
jsximport { createContext } from "react"; import Profile from "./Profile"; export const UserContext = createContext(); export default function App() { const user = { name: "John Doe", email: "john@example.com" }; return ( <UserContext.Provider value={user} > <Profile /> </UserContext.Provider> ); }
Profile.jsx
jsximport UserCard from "./UserCard"; export default function Profile() { return <UserCard />; }
UserCard.jsx
jsximport { useContext } from "react"; import { UserContext } from "./App"; export default function UserCard() { const user = useContext(UserContext); return ( <div> <h2>{user.name}</h2> <p>{user.email}</p> </div> ); }
Output
John Doe

john@example.com
Even though Profile doesn't receive any props, UserCard can still access the user information.
Reading Multiple Values
Context isn't limited to a single value.
You can provide multiple related values together.
jsxconst value = { user, isLoggedIn, logout };
Provide them.
jsx<UserContext.Provider value={value} > <App /> </UserContext.Provider>
Consume them.
jsxconst { user, isLoggedIn, logout } = useContext(UserContext);
Now every child component has access to all three values.
Example: Authentication Context
jsxconst auth = { user: { name: "John" }, isLoggedIn: true };
Inside a component:
jsxconst auth = useContext(AuthContext); return ( <> <h2> {auth.user.name} </h2> <p> {auth.isLoggedIn ? "Logged In" : "Guest"} </p> </> );
Output
John

Logged In
Example: Theme Context
Context is commonly used for themes.
jsxconst ThemeContext = createContext("light");
Provide it.
jsx<ThemeContext.Provider value="dark" > <App /> </ThemeContext.Provider>
Consume it.
jsxconst theme = useContext(ThemeContext); return ( <h2> Theme: {theme} </h2> );
Output
Theme: dark
Nested Providers
React allows multiple Context Providers in the same application.
Example:
jsx<AuthContext.Provider value={auth} > <ThemeContext.Provider value={theme} > <App /> </ThemeContext.Provider> </AuthContext.Provider>
Inside any child:
jsxconst auth = useContext(AuthContext); const theme = useContext(ThemeContext);
Now the component can access both contexts independently.
What Happens Without a Provider?
Suppose you write:
jsxconst UserContext = createContext();
Then:
jsxconst user = useContext(UserContext);
But you forget to wrap your component with a Provider.
React will return the default value passed to createContext().
Example:
jsxconst UserContext = createContext("Guest");
Without a Provider:
jsxconst user = useContext(UserContext);
Output
Guest
If no default value is provided, the result is typically undefined, which can cause runtime errors if you try to access properties like user.name.
Common Mistakes
Forgetting to Wrap with Provider
❌
jsx<UserProfile />
The component cannot access the shared Context value.
Correct
✅
jsx<UserContext.Provider value={user} > <UserProfile /> </UserContext.Provider>
Importing the Wrong Context
If your application has multiple Contexts, make sure you import the correct one.
❌
jsxuseContext(ThemeContext);
when you intended to read:
jsxUserContext
Always double-check your imports.
Using Context for Everything
Context is useful for shared application state, but avoid placing every piece of data into it.
For example, a form input used only within a single component should remain local state with useState.
Using Context unnecessarily can make components harder to understand and may trigger unnecessary re-renders.
Best Practices
- Use meaningful names such as
AuthContext,ThemeContext, orCartContext. - Keep each Context focused on one concern.
- Wrap only the components that actually need the Context.
- Use
useContext()only inside React function components or custom Hooks. - Store truly shared state in Context and keep component-specific state local.
Summary
The useContext Hook is the easiest way to access shared data from a Context. It removes the need for prop drilling and allows any component inside a Provider to read shared values directly.
Together, createContext(), Provider, and useContext() form the foundation of the React Context API.
In the next section, we'll build several real-world projects using Context, including a Dark Mode Toggle, User Authentication System, Shopping Cart, and Language Switcher, to see how Context is used in production applications.
Real-World Examples of React Context API
Now that you've learned how to create a Context and access it using the useContext Hook, let's build some practical examples.
These are the kinds of applications where the Context API truly shines.
We'll cover:
- Theme Switcher
- User Authentication
- Shopping Cart
- Language Switcher
- Application Settings
These examples are commonly used in production React applications.
Example 1: Dark Mode Theme Switcher
One of the most popular uses of Context is managing application themes.
Instead of passing a theme prop through multiple components, we can store it in a Context.
Step 1: Create Theme Context
jsximport { createContext } from "react"; export const ThemeContext = createContext();
Step 2: Provide Theme
jsximport { useState } from "react"; import { ThemeContext } from "./ThemeContext"; import Home from "./Home"; export default function App() { const [theme, setTheme] = useState("light"); return ( <ThemeContext.Provider value={{ theme, setTheme }} > <Home /> </ThemeContext.Provider> ); }
Step 3: Consume Theme
jsximport { useContext } from "react"; import { ThemeContext } from "./ThemeContext"; export default function Home() { const { theme, setTheme } = useContext(ThemeContext); return ( <div className={theme}> <h2> Current Theme: {theme} </h2> <button onClick={() => setTheme( theme === "light" ? "dark" : "light" ) } > Toggle Theme </button> </div> ); }
Output
Current Theme: Light

↓

Button Click

↓

Current Theme: Dark
Flow
Button Click

↓

Update Context

↓

All Components Using Theme

↓

Automatically Re-render
Example 2: User Authentication
Authentication is another perfect use case for Context.
Instead of passing the logged-in user everywhere,
store it globally.
Auth Context
jsximport { createContext } from "react"; export const AuthContext = createContext();
Provider
jsximport { useState } from "react"; import { AuthContext } from "./AuthContext"; export default function App() { const [user, setUser] = useState({ name: "John Doe" }); return ( <AuthContext.Provider value={{ user, setUser }} > <Dashboard /> </AuthContext.Provider> ); }
Navbar
jsximport { useContext } from "react"; import { AuthContext } from "./AuthContext"; export default function Navbar() { const { user } = useContext(AuthContext); return ( <h2> Welcome {user.name} </h2> ); }
Output
Welcome John Doe
Now every page can access the logged-in user.
Examples:
- Navbar
- Dashboard
- Checkout
- Orders
- Profile
without passing props.
Example 3: Shopping Cart
Almost every e-commerce website needs a shopping cart.
Instead of passing cart items across multiple pages,
Context makes everything simple.
jsxconst CartContext = createContext();
Provider
jsxconst [cart, setCart] = useState([]);
jsx<CartContext.Provider value={{ cart, setCart }} > <App /> </CartContext.Provider>
Consume
jsxconst { cart, setCart } = useContext(CartContext);
Add Product
jsxsetCart([ ...cart, product ]);
Now these components automatically receive updated cart data.
Navbar

Product Page

Checkout

Mini Cart

Wishlist
Whenever the cart changes,
all of them update instantly.
Example 4: Language Switcher
Many websites support multiple languages.
English

Hindi

French

German
Create Context
jsxconst LanguageContext = createContext();
Provider
jsxconst [language, setLanguage] = useState("English");
Consume
jsxconst { language, setLanguage } = useContext(LanguageContext);
Output
Current Language

↓

English

↓

Hindi

↓

French
Every component updates automatically.
Example 5: Application Settings
Applications often have shared settings.
Examples
- Font Size
- Currency
- Time Zone
- Notification Settings
- Sidebar Collapse
- Layout Mode
Instead of storing these settings in multiple components,
Context provides one central source of truth.
jsxconst SettingsContext = createContext();
jsxconst settings = { currency: "USD", notifications: true, sidebar: true };
Every page can access these settings directly.
Multiple Contexts Together
Large applications usually have several Contexts.
Example
jsx<AuthContext.Provider value={auth} > <ThemeContext.Provider value={theme} > <CartContext.Provider value={cart} > <LanguageContext.Provider value={language} > <App /> </LanguageContext.Provider> </CartContext.Provider> </ThemeContext.Provider> </AuthContext.Provider>
Inside any component
jsxconst auth = useContext(AuthContext); const theme = useContext(ThemeContext); const cart = useContext(CartContext); const language = useContext(LanguageContext);
Each Context has a single responsibility, making the application easier to organize.
Should Everything Be Stored in Context?
No.
A common mistake is placing every piece of state into Context.
For example,
this does not belong in Context.
jsxconst [email, setEmail] = useState("");
If it's only used inside a login form,
keep it as local component state.
Use Context only when multiple unrelated components need the same data.
A simple guideline:
| Store in Context | Keep Local |
|---|---|
| Logged-in user | Form inputs |
| Theme | Modal visibility (single component) |
| Shopping cart | Search input |
| Language | Tooltip state |
| Currency | Button hover state |
| Notifications | Temporary UI state |
Best Practices
When building real applications with Context:
- Create separate Contexts for separate concerns.
- Keep Context values focused and meaningful.
- Avoid storing short-lived UI state globally.
- Wrap only the components that need access to the Context.
- Combine Context with
useReducerwhen state updates become more complex.
Summary
The React Context API is ideal for managing shared application state such as themes, authentication, shopping carts, languages, and global settings. By centralizing this data, you eliminate prop drilling and keep your components cleaner and easier to maintain.
As your applications grow, you'll often combine Context with Hooks like useReducer to manage more complex state logic efficiently.
In the next section, we'll explore Common Mistakes and Best Practices for the Context API, including overusing Context, unnecessary re-renders, performance considerations, and when to choose alternatives.
Frequently Asked Questions (FAQs)
1. What is the React Context API?
The React Context API is a built-in feature that allows you to share data between components without manually passing props through every level of the component tree.
It is commonly used for global application state such as:
- User authentication
- Theme
- Language
- Shopping cart
- Application settings
2. What problem does Context solve?
Context solves prop drilling.
Instead of passing data through multiple intermediate components,
App

↓

Dashboard

↓

Profile

↓

UserCard
Context allows any component inside the Provider to access the data directly.
3. What is Prop Drilling?
Prop drilling is the process of passing the same props through multiple components even when intermediate components don't use them.
Example:
jsx<App user={user} /> ↓ <Dashboard user={user} /> ↓ <Profile user={user} /> ↓ <UserCard user={user} />
Context removes this unnecessary prop passing.
4. What is createContext()?
createContext() creates a new Context object.
jsximport { createContext } from "react"; const UserContext = createContext();
It creates a place where shared data can be stored.
5. What is a Provider?
A Provider makes Context data available to child components.
Example:
jsx<UserContext.Provider value={user} > <App /> </UserContext.Provider>
Every component inside the Provider can access the user object.
6. What does useContext() do?
useContext() reads the value from the nearest matching Context Provider.
Example:
jsxconst user = useContext(UserContext);
React automatically returns the value stored in the Provider.
7. Can I have multiple Contexts?
Yes.
Large applications commonly use multiple Contexts.
Example:
- AuthContext
- ThemeContext
- CartContext
- LanguageContext
- SettingsContext
Each Context manages one responsibility.
8. Does Context replace Redux?
No.
Context and Redux solve different problems.
Context is ideal for sharing relatively simple global state.
Redux provides additional features such as:
- Centralized state management
- Middleware
- DevTools
- Predictable state updates
- Better handling of complex application state
Many applications work perfectly with Context alone, while larger applications may benefit from Redux or other state management libraries.
9. Is Context faster than props?
Not necessarily.
Props are already very efficient.
Context is designed to simplify data sharing, not to improve performance.
Choose Context because it improves code organization and reduces prop drilling—not because it's inherently faster.
10. When should I avoid Context?
Avoid Context for data that's only used within a single component or a small parent-child relationship.
Examples include:
- Form fields
- Button states
- Modal visibility (used in one place)
- Hover effects
- Temporary UI state
Local component state is usually the better option for these cases.
React Context API Interview Questions
Beginner Level
1. What is the React Context API?
Answer:
The Context API is a built-in React feature that allows components to share data without manually passing props through every level of the component tree.
2. What is prop drilling?
Answer:
Prop drilling is passing props through intermediate components that don't actually use the data, simply so child components can access it.
3. What is the difference between createContext() and useContext()?
Answer:
createContext()creates a new Context object.useContext()reads the value from the nearest matching Provider.
4. What is a Provider?
Answer:
A Provider supplies a Context value to all components within its subtree.
Example:
jsx<UserContext.Provider value={user}> <App /> </UserContext.Provider>
5. What happens if no Provider exists?
Answer:
React returns the default value passed to createContext().
If no default value is provided, useContext() typically returns undefined, which can lead to runtime errors if not handled properly.
Intermediate Level
6. Can multiple Providers use the same Context?
Answer:
Yes.
Each Provider supplies its own value, and components consume the value from the nearest Provider in the component tree.
7. Why shouldn't everything be stored in Context?
Answer:
Storing unrelated or frequently changing state in Context can cause unnecessary re-renders and make the application harder to maintain.
Use Context only for state that's genuinely shared across many components.
8. How can you improve Context performance?
Answer:
Some common techniques include:
- Splitting large Contexts into smaller ones.
- Memoizing Provider values with
useMemowhen appropriate. - Keeping Context values focused.
- Avoiding frequent updates to Context.
9. Can Context replace component state?
Answer:
No.
Component state (useState) is still the best choice for local UI state.
Context complements local state rather than replacing it.
10. When would you choose Context over props?
Answer:
Use Context when:
- Many unrelated components need the same data.
- Passing props through multiple levels becomes cumbersome.
- The data represents application-wide state such as authentication, themes, or shopping carts.
Summary
Congratulations! 🎉
You've successfully learned the fundamentals of the React Context API.
In this guide, you explored:
- What the Context API is
- Why prop drilling is a problem
- Creating a Context with
createContext() - Sharing data using a Provider
- Reading data with
useContext() - Real-world examples including themes, authentication, shopping carts, and language switching
- Common mistakes to avoid
- Best practices for organizing and optimizing Context
- Frequently asked questions
- Interview questions
The Context API is one of React's most useful built-in features for sharing application-wide data. Used appropriately, it helps reduce repetitive prop passing and makes your component hierarchy cleaner and easier to maintain.
Remember that Context isn't a replacement for all state management. Use it for shared global data, while keeping component-specific state local whenever possible.
Key Takeaways
- The Context API helps eliminate prop drilling.
- Create a Context using
createContext(). - Share data using a
Provider. - Read shared values with
useContext(). - Split Contexts by responsibility (e.g., Auth, Theme, Cart).
- Keep local UI state inside components.
- Avoid placing every piece of state into Context.
- Organize Providers for better readability in large applications.
- Consider
useMemofor Provider values when performance optimization is necessary.
What's Next?
Now that you understand how to share state globally with the React Context API, it's time to learn how to reference DOM elements and persist mutable values without triggering re-renders.
In the next tutorial, we'll cover React useRef Hook Explained, where you'll learn:
- What
useRefis and why it's useful - How refs differ from state
- Accessing DOM elements
- Managing input focus
- Storing mutable values
- Preventing unnecessary re-renders
- Integrating refs with timers and third-party libraries
- Common mistakes and best practices
- Real-world examples, FAQs, and interview questions
By the end of that guide, you'll understand when to choose useRef over useState and how to use it effectively in modern React applications.