How to Install React with Vite
If you're starting a new React project today, the recommended approach is to use Vite instead of older tools such as Create React App (CRA).
Vite is a modern frontend build tool that offers extremely fast project creation, near-instant development server startup, and lightning-fast Hot Module Replacement (HMR). It has become the preferred choice for React developers because it provides a faster and more efficient development experience.
In this guide, you'll learn how to install React using Vite, understand the generated project structure, run your first React application, and prepare your project for production.
By the end of this tutorial, you'll have a fully functional React application running on your local machine.
What is Vite?
Vite (pronounced "veet", the French word for "fast") is a modern frontend build tool created by Evan You, the creator of Vue.js.
Unlike traditional bundlers that process the entire application before starting the development server, Vite serves source files directly using native ES Modules. This allows the development server to start almost instantly, even for large projects.
Vite supports many frontend frameworks, including:
- React
- Vue
- Svelte
- Preact
- SolidJS
- Lit
Although framework-agnostic, Vite has become the standard choice for new React projects.
Why Use Vite Instead of Create React App?
For many years, Create React App (CRA) was the default way to start a React project.
However, Vite provides several advantages.
| Feature | Vite | Create React App |
|---|---|---|
| Startup Speed | Extremely Fast | Slower |
| Hot Module Replacement | Instant | Good |
| Build Performance | Excellent | Good |
| Configuration | Simple | More Complex |
| Modern Tooling | Yes | Limited |
Because of these benefits, most modern React projects now begin with Vite.
Prerequisites
Before installing React, make sure your system includes:
- Node.js
- npm (installed with Node.js)
- A code editor such as Visual Studio Code
- A terminal or command prompt
- Basic knowledge of HTML, CSS, and JavaScript
You don't need prior React experience to follow this guide.
Step 1 — Verify Node.js Installation
React projects use Node.js during development and build processes.
Check whether Node.js is installed.
bashnode -v
Example output:
textv22.18.0
Next, verify npm.
bashnpm -v
Example:
text10.9.3
If both commands return version numbers, you're ready to continue.
Step 2 — Install Node.js (If Required)
If Node.js isn't installed, download the latest LTS version from the official Node.js website.
After installation, restart your terminal and verify the installation again.
bashnode -v npm -v
Both commands should display installed versions.
Step 3 — Create a New React Project
Navigate to the directory where you want to create your project.
Example:
bashcd ~/Projects
Now create a new React application using Vite.
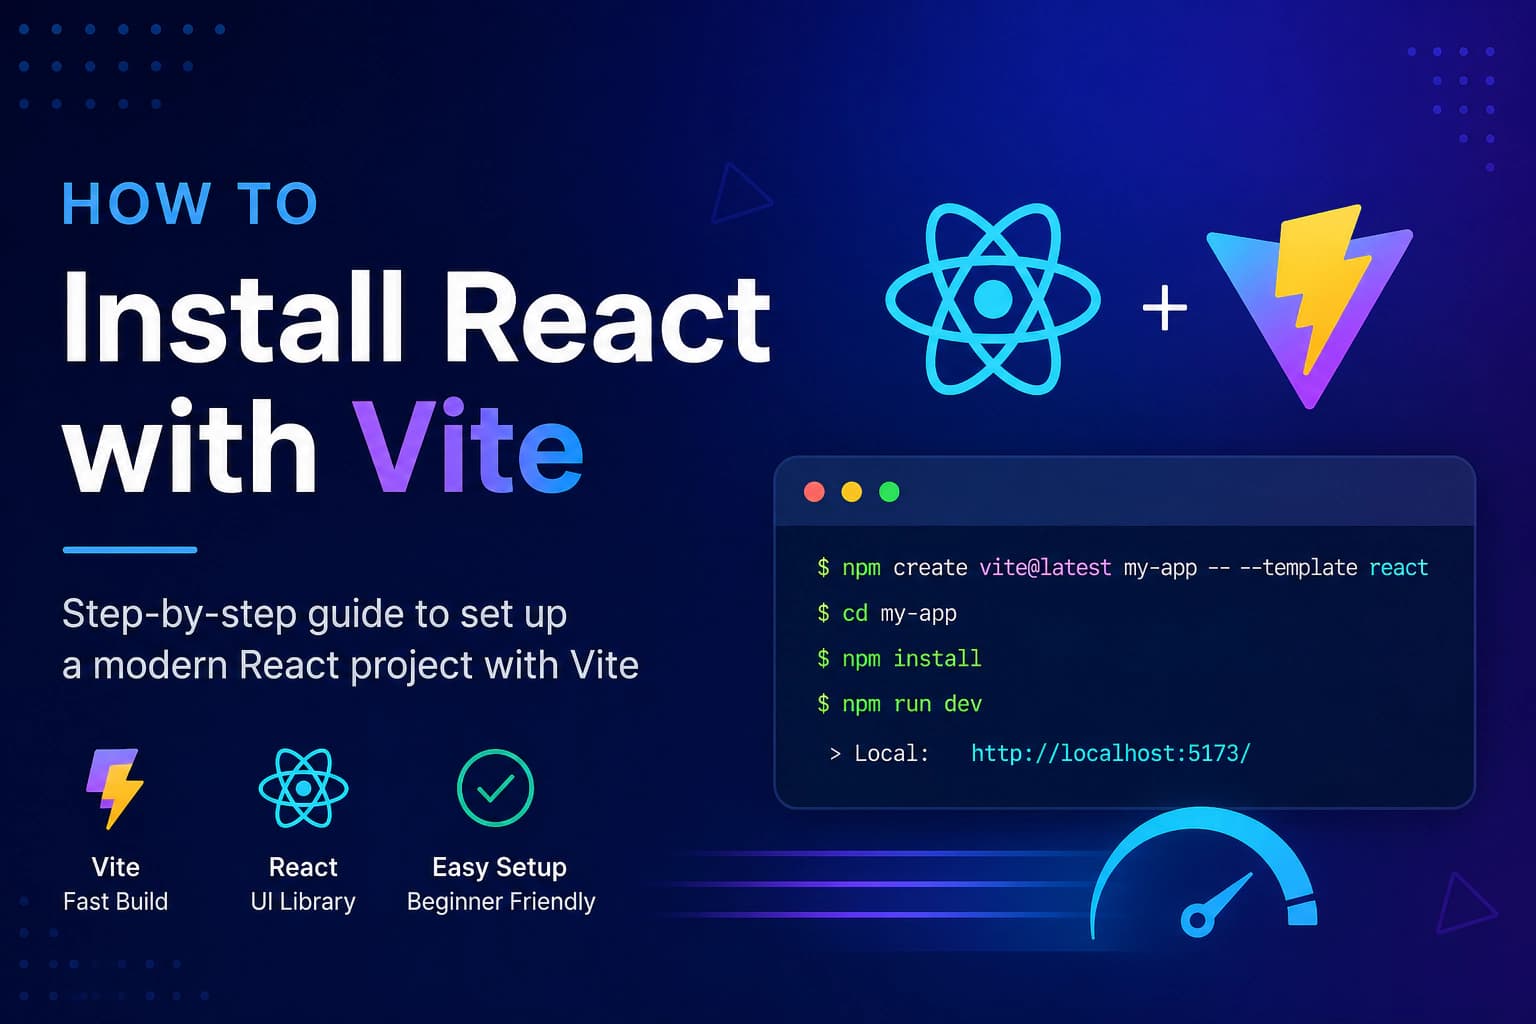
bashnpm create vite@latest
You'll be prompted for a few options.
Example:
textProject name:
Enter:
textmy-react-app
Next, choose a framework.
textReact
Then select a variant.
textJavaScript
or
textTypeScript
For beginners, JavaScript is a great starting point.
Vite will generate the project structure in just a few seconds.
Step 4 — Navigate to the Project
Move into the project directory.
bashcd my-react-app
You are now inside your React project and ready to install its dependencies.
Step 5 — Install Project Dependencies
Before you can run the application, install all required dependencies.
Inside your project directory, run:
bashnpm install
or simply:
bashnpm i
npm reads the package.json file and downloads all required packages into the node_modules directory.
Example output:
textadded 153 packages audited 154 packages found 0 vulnerabilities
The installation usually takes less than a minute, depending on your internet connection.
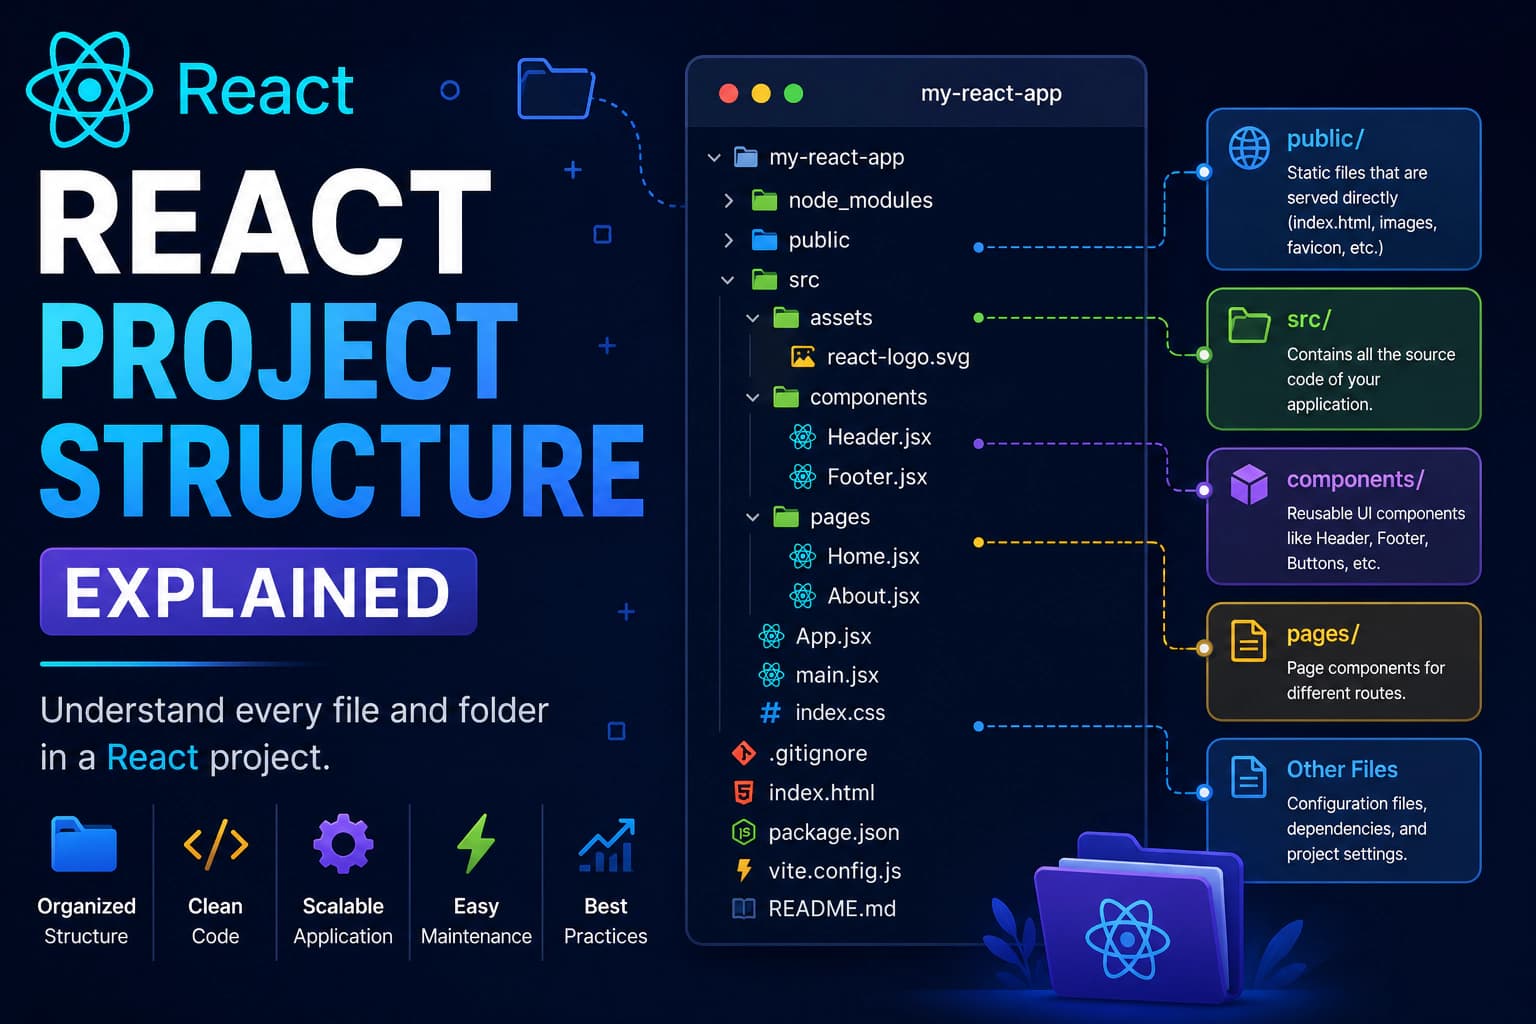
Step 6 — Understand the Project Structure
Once the installation completes, you'll see a folder structure similar to this:
textmy-react-app │ ├── node_modules/ ├── public/ ├── src/ │ ├── assets/ │ ├── App.css │ ├── App.jsx │ ├── index.css │ └── main.jsx │ ├── .gitignore ├── index.html ├── package.json ├── package-lock.json ├── vite.config.js └── README.md
Let's understand what each folder and file does.
node_modules
This folder contains all the installed packages and dependencies.
You should never edit files inside this directory manually.
Since it can become very large, it's usually excluded from version control using .gitignore.
public
The public folder stores static assets that don't require processing.
Examples include:
- Images
- Icons
- PDF files
- robots.txt
- favicon.ico
Files placed here can be accessed directly from the browser.
Example:
textpublic/logo.png
Accessible as:
texthttp://localhost:5173/logo.png
src
The src folder contains your application's source code.
This is where you'll spend most of your development time.
Common files include:
- Components
- Pages
- Styles
- Hooks
- Utilities
Everything related to your React application lives inside this directory.
assets
The assets folder is typically used for project-specific resources.
Examples:
- Images
- SVG icons
- Fonts
- Videos
Unlike the public folder, these files are processed by Vite during the build.
App.jsx
This is the main React component.
When you first create a Vite project, it contains the default React example.
Example:
jsxfunction App() { return <h1>Hello React!</h1>; } export default App;
As your project grows, this file usually becomes the root component that renders the rest of your application.
main.jsx
This is the application's entry point.
Example:
jsximport React from "react"; import ReactDOM from "react-dom/client"; import App from "./App.jsx"; import "./index.css"; ReactDOM.createRoot( document.getElementById("root") ).render( <React.StrictMode> <App /> </React.StrictMode> );
This file tells React to render the App component inside the HTML element with the ID root.
package.json
The package.json file contains information about your project.
It defines:
- Project name
- Version
- Scripts
- Dependencies
- Development dependencies
Example:
json{ "name": "my-react-app", "private": true, "scripts": { "dev": "vite", "build": "vite build" } }
Every React project includes this file.
vite.config.js
This file contains the Vite configuration.
For small projects, the default configuration is usually sufficient.
As your application grows, you can customize:
- Aliases
- Plugins
- Build options
- Development server
- Proxy settings
Step 7 — Start the Development Server
Now it's time to run your React application.
Execute:
bashnpm run dev
Example output:
textVITE v7.x.x ready in 320 ms ➜ Local: http://localhost:5173/ ➜ Network: http://192.168.1.5:5173/
The Local URL allows you to access the application from your own computer.
The Network URL can be used by other devices on the same local network.
Step 8 — Open the Application
Open your browser and visit:
texthttp://localhost:5173
You should see the default Vite + React welcome screen.
Congratulations! 🎉
Your first React application is now running successfully.
Step 9 — Hot Module Replacement (HMR)
One of Vite's best features is Hot Module Replacement (HMR).
This means that when you save a file, the browser updates instantly without refreshing the entire page.
For example, open:
textsrc/App.jsx
Replace the default content with:
jsxfunction App() { return ( <h1>Welcome to React!</h1> ); } export default App;
Save the file.
Your browser will update immediately, showing the new heading.
This fast feedback loop makes development much more productive.
Step 10 — Build Your React Application
During development, Vite serves your application using a development server.
Before deploying your project, you need to create an optimized production build.
Run:
bashnpm run build
Example output:
textvite v7.x.x building for production... ✓ 32 modules transformed. dist/index.html dist/assets/index-xxxxx.js dist/assets/index-xxxxx.css ✓ built successfully
Vite automatically:
- Minifies JavaScript
- Optimizes CSS
- Compresses assets
- Generates production-ready files
The final build is stored inside the dist directory.
Step 11 — Preview the Production Build
Instead of uploading the project immediately, you can preview the production version locally.
Run:
bashnpm run preview
Example:
textLocal: http://localhost:4173
Open the URL in your browser.
You're now viewing the optimized production version of your React application.
Understanding the dist Folder
After running the build command, Vite creates:
textdist/ ├── assets/ ├── index.html └── favicon.svg
This folder contains everything needed to deploy your application.
You should upload only the dist folder to your hosting provider.
Common npm Scripts
Every Vite project includes useful npm scripts.
| Command | Purpose |
|---|---|
npm install | Install dependencies |
npm run dev | Start development server |
npm run build | Create production build |
npm run preview | Preview production build |
These four commands are the ones you'll use most frequently while developing React applications.
Common Installation Errors
'node' is not recognized
If you see:
textnode: command not found
or
text'node' is not recognized
Node.js is either not installed or isn't available in your system's PATH.
Verify the installation:
bashnode -v
'npm' is not recognized
Run:
bashnpm -v
If npm isn't available, reinstall Node.js using the latest LTS version.
Port Already in Use
Sometimes another application is already using port 5173.
Vite will automatically choose another available port.
For example:
texthttp://localhost:5174
You can also manually specify a port:
bashnpm run dev -- --port 3000
Module Not Found
This usually means dependencies haven't been installed.
Run:
bashnpm install
Then restart the development server.
Failed to Compile
Compilation errors are often caused by:
- Missing semicolons (depending on your code style)
- Incorrect imports
- Missing closing tags
- Syntax errors
Read the error message carefully—it usually points to the exact file and line number.
Best Practices
When starting a new React project:
- Use the latest LTS version of Node.js.
- Create new projects with Vite.
- Keep dependencies up to date.
- Organize components into dedicated folders.
- Use meaningful file and component names.
- Commit your code regularly using Git.
- Avoid modifying files inside
node_modules.
Following these practices makes your projects easier to maintain and scale.
Frequently Asked Questions
Is Vite better than Create React App?
For most new projects, yes.
Vite offers:
- Faster startup
- Faster builds
- Better developer experience
- Modern tooling
Can I use TypeScript with Vite?
Yes.
When creating a project, simply choose the TypeScript variant instead of JavaScript.
Do I need internet after installation?
No.
Once dependencies are installed, you can continue developing locally without an internet connection.
Which code editor should I use?
Visual Studio Code is one of the most popular editors for React development because of its rich extension ecosystem and excellent debugging support.
Can I deploy a Vite project anywhere?
Yes.
The production build can be deployed to many static hosting platforms and web servers, including Nginx, Apache, and popular cloud hosting providers.
Conclusion
Congratulations! 🎉
You've successfully created your first React application using Vite.
In this guide, you learned how to:
- Install React with Vite
- Verify Node.js and npm
- Create a new React project
- Understand the project structure
- Run the development server
- Use Hot Module Replacement
- Build a production-ready application
- Preview the production build
- Troubleshoot common installation issues
Vite provides a modern and efficient development experience, making it an excellent choice for building React applications of all sizes.
Continue the React Learning Path
Continue with the next guide:
- ✅ What is React?
- ✅ Install React with Vite
- ➜ React Project Structure Explained
- JSX Explained
- React Components
- Props
- State
- useState Hook
- Event Handling
- Conditional Rendering
- Lists & Keys
- Forms
- useEffect Hook
- React Router
- API Integration
By following this learning path, you'll build a strong foundation in React before moving on to more advanced topics.
Need Professional React Development?
Whether you're building a business website, SaaS platform, admin dashboard, or custom web application, Paridhi Solutions can help.
Our React development services include:
- React.js Development
- Next.js Development
- Custom Dashboard Development
- REST API & GraphQL Integration
- UI/UX Implementation
- Performance Optimization
- Application Maintenance & Support
🌐 Website: https://paridhisolutions.com
📧 Email: info@paridhisolutions.com
If you found this guide helpful, consider bookmarking it and sharing it with other developers.